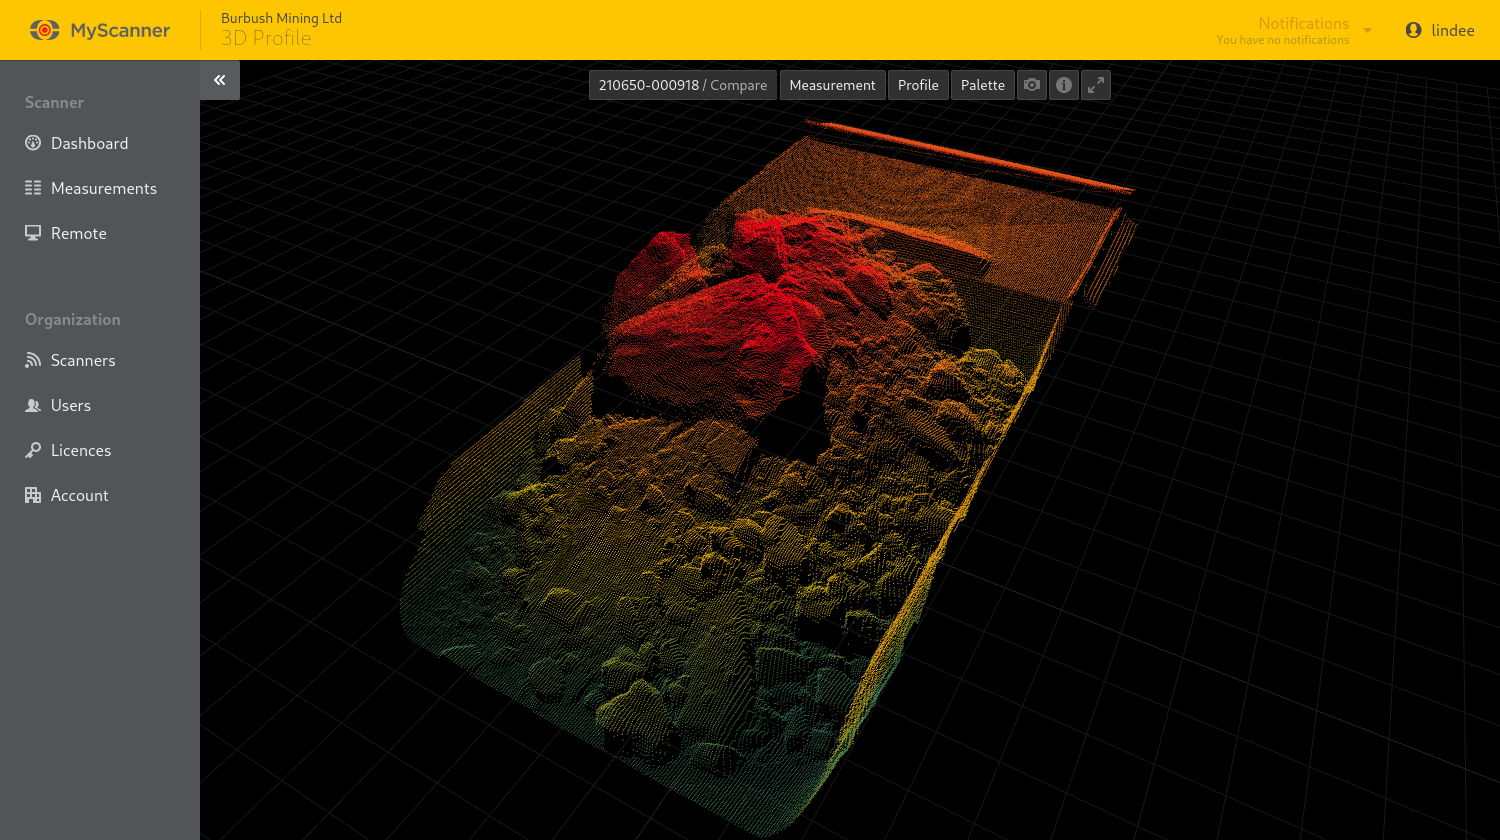
The 3D profiler can be used to inspect any recent scans which were uploaded by an LVS or MPS with the required updates. With the 3D profiler, you can compare scans, view a 2D profile of the scan, measure between two points and more. MyScanner’s measurements page will provide links to the 3D profiler for any scan which has related 3D profile data uploaded to MyScanner.
Navigating to the 3D profiler
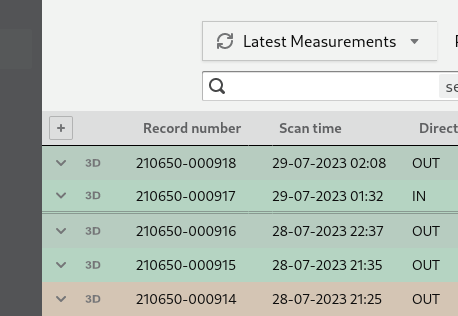
To navigate to the 3D profiler, from the measurements page located the scan you are interested in, if MyScanner has 3D profile data for the scan it will display a 3D button ![]() on the measurement row, clicking the 3D button will navigate to the 3D profiler.
on the measurement row, clicking the 3D button will navigate to the 3D profiler.
3D profiler controls
| Action | Mouse controls | Touch controls |
|---|---|---|
| Rotate the camera around the bins | Left click + drag | Tap + drag |
| Pan the camera | Ctrl button + left click + drag | Two finger tap + drag |
| Zoom the camera in and out | Scroll in / out | Pinch in / out |
| Move the profiler pane up and down the scan | Left click + drag on profiler pane with the profiler tool active | Tap + drag on profiler pane with the profiler tool active |
| Start or end a measurement | Left click on bin with measurement tool active | Tap on bin with measurement tool active |
| Move the measurement point | Left click + drag on measurement point | Tap + drag on measurement point |
Scan picker and compare tool
Note!
Comparison scans cannot be selected when using lower resolution screens, e.g., on mobile.
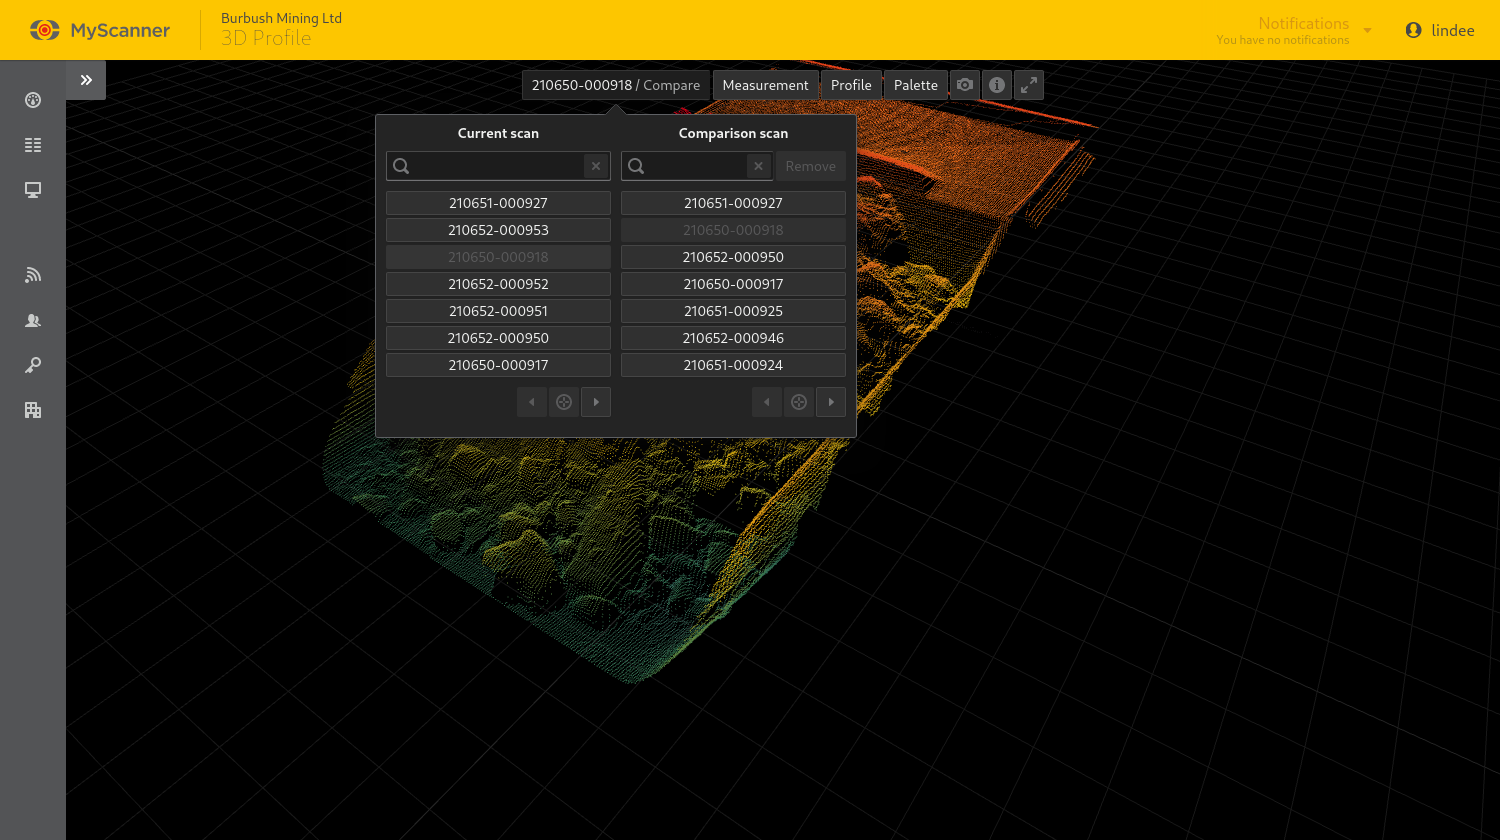
Use the scan picker and compare tool to change the current scan and pick a comparison scan.
The picker shows scans across all scanners for the current organization. By default comparison options are filtered to only show scans which have the same combination of identified vehicles in the scan as the current scan. However, all scans can be searched for in the comparison search input.
Move tool
Note!
The move tool is only available when comparing scans and not on lower resolution screens.
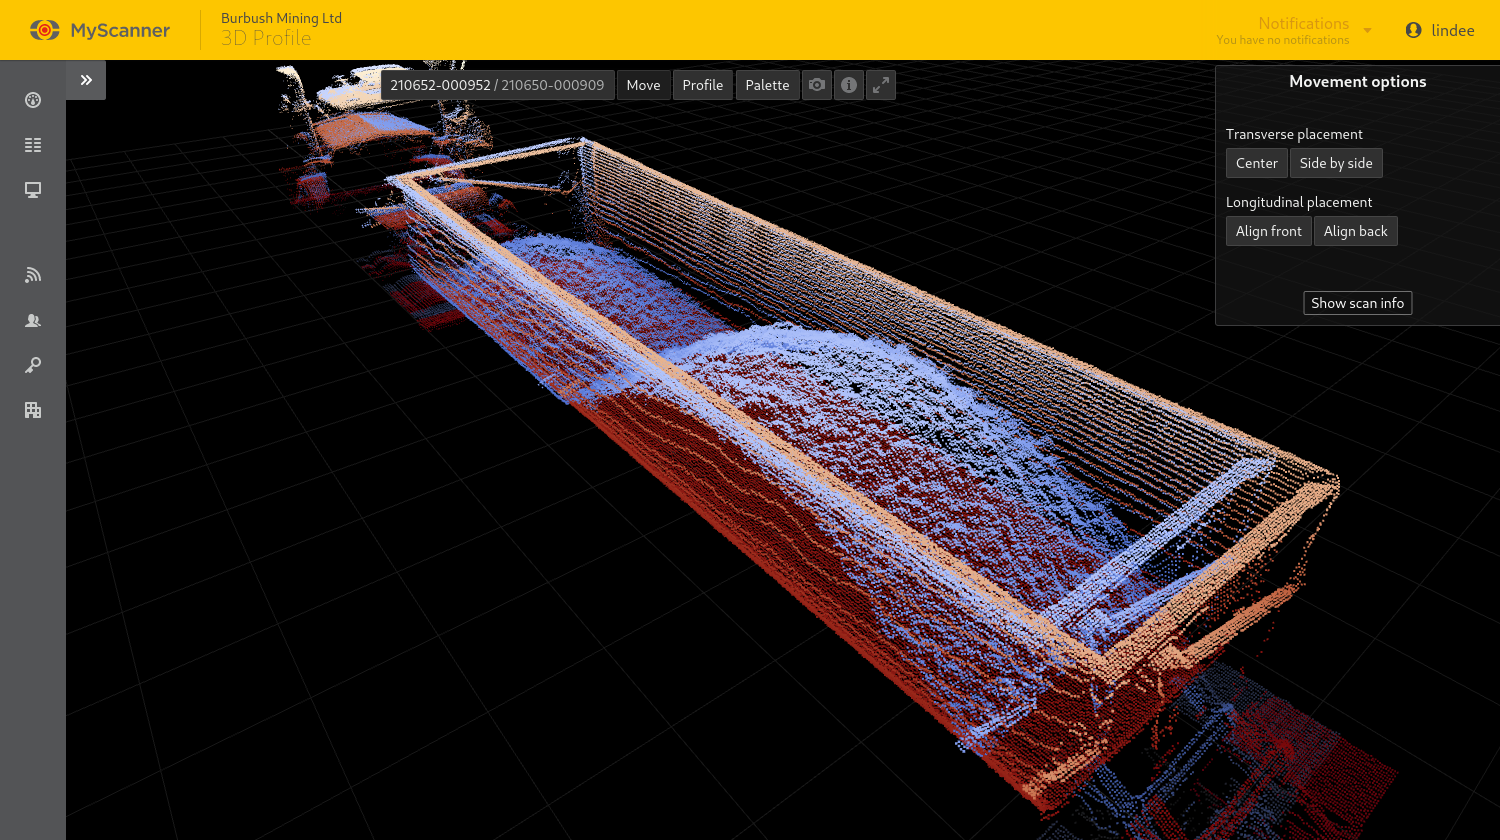
With the move tool active the comparison scan can be moved by clicking and dragging on the comparison scan in the 3D view. The tool option panel to the right of the 3D view presents options to quickly align the two scans.
Moving the scans in the 3D space will also affect their position in the 2D profile plots.
3D measure tool
Note!
The measure tool is not available when comparing scans or and on lower resolution screens.
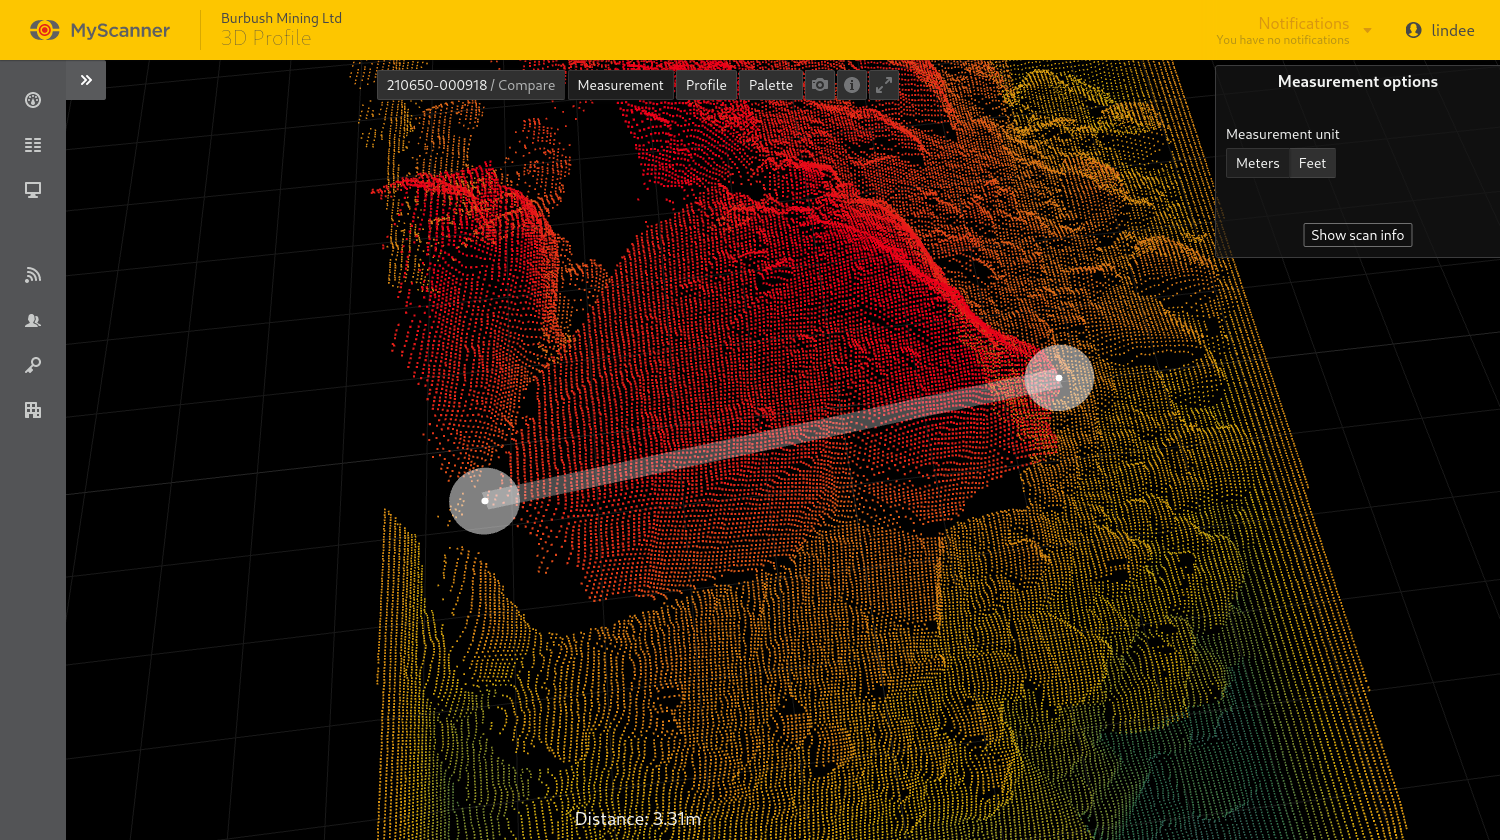
With the measure tool active clicking on two points of the bins in the 3D view will create a measurement and the computed distance will be outputted at the bottom of the 3D view. Minor adjustments to the measurement can be made by clicking and dragging on the measurement’s handles. The handles will always try lock to points in the point cloud data.
The reported distance can changed to output in metres or yards using the tool options that appear to the right of the 3D view. The selected measurement unit also applies to 2D profile measurements and the browser will remember the last used measurement unit until the user logs out of MyScanner.
2D profiler tool
Note!
The 2D profiler is not available for lower resolution screens.
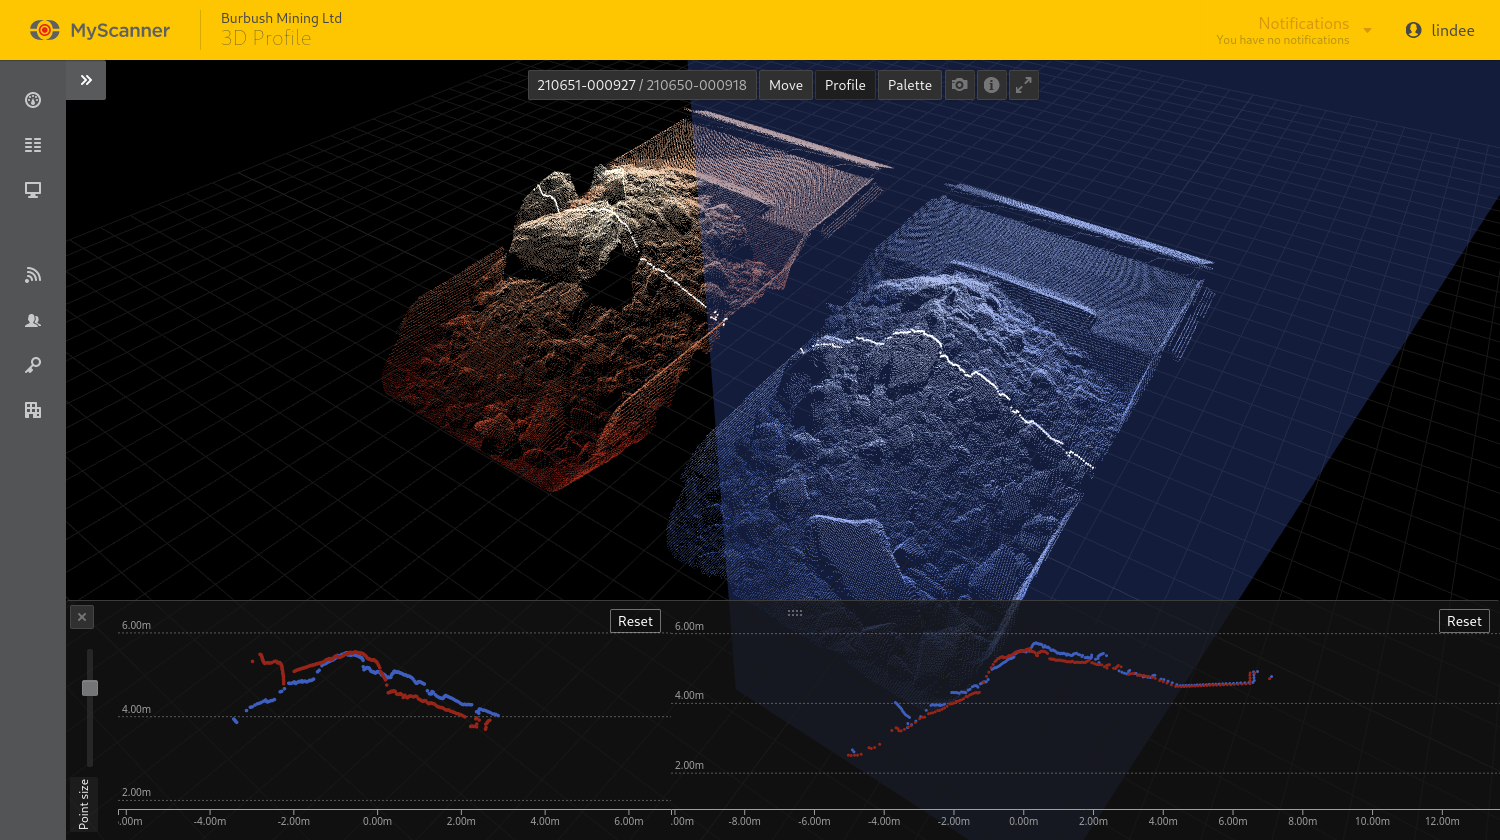
The 2D profiler tool adds an interactive blue pane to the 3D view. The profiler pane represents the position the LVS or MPS would be above the vehicle for the scan data shown in the 2D plots. The left plot shows the current transverse scan data as seen at the profiler pane’s position. Likewise, the right plot shows the current longitudinal scan data at the profiler pane’s position.
The point size slider to the left of the profile plots changes the size of the scan line points in the plots.
| Action | Mouse controls | Touch controls |
|---|---|---|
| Pan the view | Click + Drag | Tap + Drag |
| Zoom in and out | Scroll in / out | Pinch in / out |
| Start or end a measurement | Click on point | Tap on point |
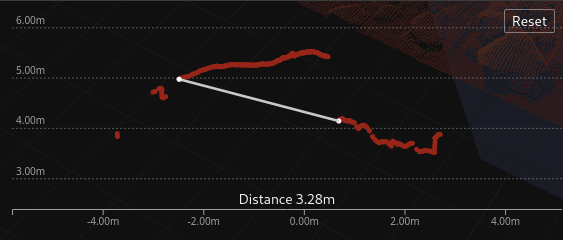
The distance between points can be measured in the 2D profiles by clicking on two points in a plot, the computed distance will be displayed at the bottom of the plot and will also display in the 3D view when measuring distances in the transverse plot.
Palette tool
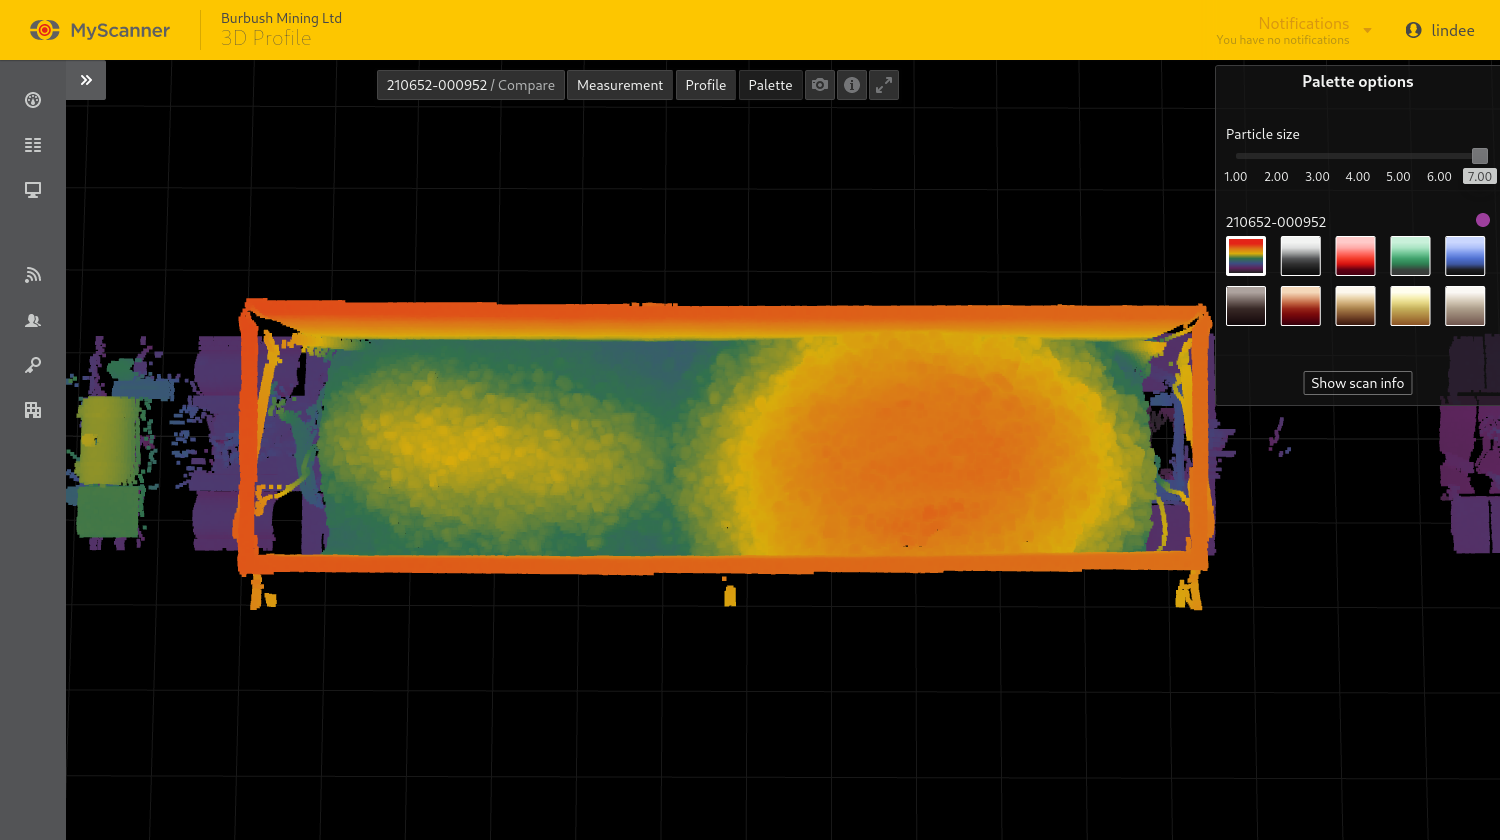
When the palette tool is active the tool options panel presents options to change the colours of the bins and the particle size being used when rendering the 3D point clouds.
Lower particle sizes make the bins more see-through and can be better when comparing two bins. Higher particle sizes help when visually identifying large rocks in a load.
The browser will remember the the last used particle size and bin colors until the user logs out of MyScanner.
Snapshot tool
A snapshot can be taken by clicking on the snapshot button ![]() . When clicked a capture of the current 3D view will be opened in a new tab and / or downloaded depending on the browser used.
. When clicked a capture of the current 3D view will be opened in a new tab and / or downloaded depending on the browser used.
The scan info panel
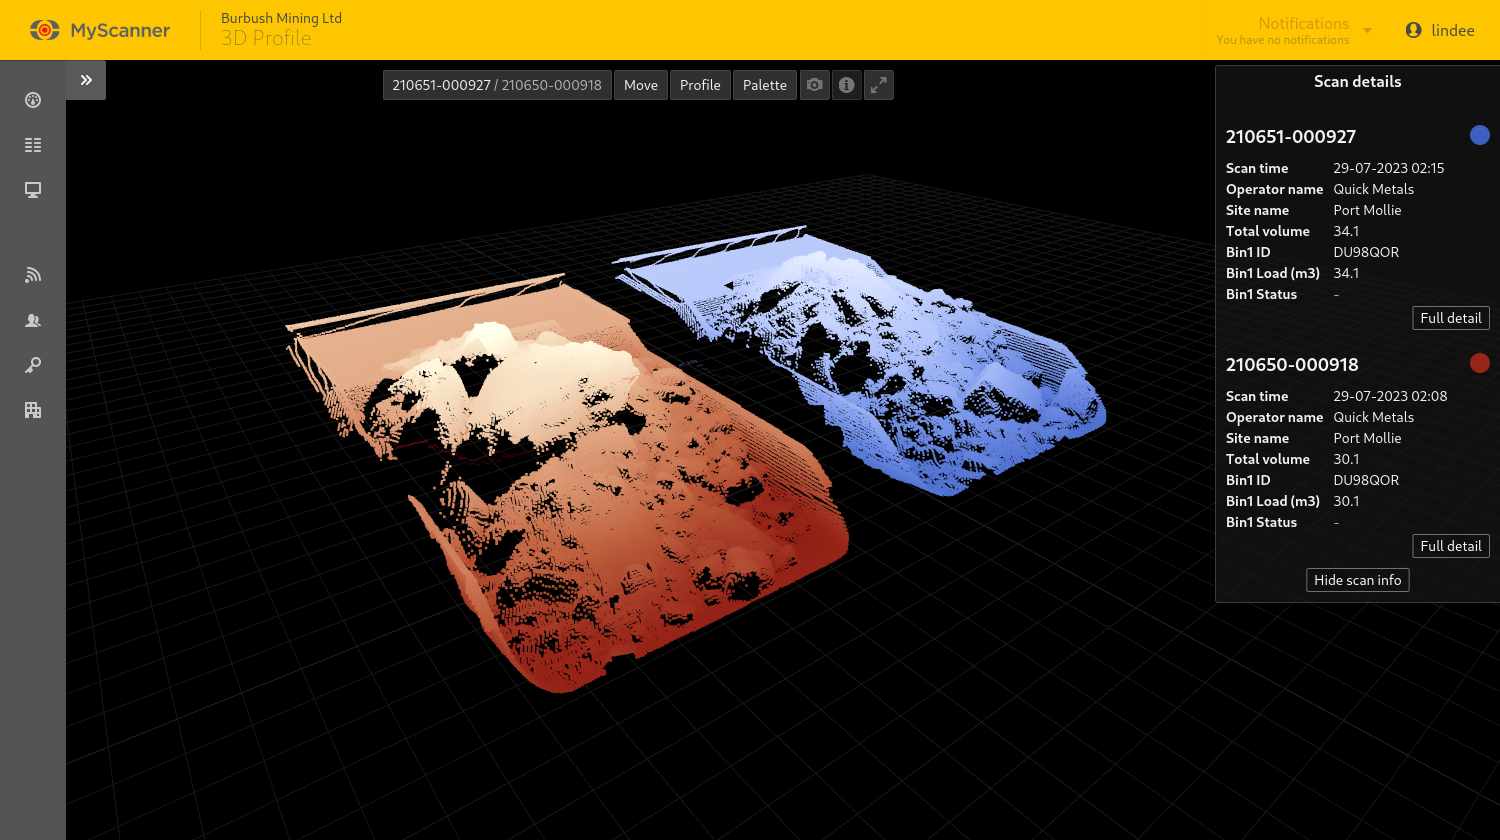
The scan info panel can be opened by clicking on the info button ![]() . When clicked, information about the displayed scans will be shown with links to their detail pages.
. When clicked, information about the displayed scans will be shown with links to their detail pages.
In this Article
The 3D profiler can be used to inspect any recent scans which were uploaded by an LVS or MPS with the required updates. With the 3D profiler, you can compare scans, view a 2D profile of the scan, measure between two points and more. MyScanner’s measurements page will provide links to the 3D profiler for any scan which has related 3D profile data uploaded to MyScanner.

Navigating to the 3D profiler
To navigate to the 3D profiler, from the measurements page located the scan you are interested in, if MyScanner has 3D profile data for the scan it will display a 3D button ![]() on the measurement row, clicking the 3D button will navigate to the 3D profiler.
on the measurement row, clicking the 3D button will navigate to the 3D profiler.

3D profiler controls
| Action | Mouse controls | Touch controls |
|---|---|---|
| Rotate the camera around the bins | Left click + drag | Tap + drag |
| Pan the camera | Ctrl button + left click + drag | Two finger tap + drag |
| Zoom the camera in and out | Scroll in / out | Pinch in / out |
| Move the profiler pane up and down the scan | Left click + drag on profiler pane with the profiler tool active | Tap + drag on profiler pane with the profiler tool active |
| Start or end a measurement | Left click on bin with measurement tool active | Tap on bin with measurement tool active |
| Move the measurement point | Left click + drag on measurement point | Tap + drag on measurement point |
Scan picker and compare tool

Note!
Comparison scans cannot be selected when using lower resolution screens, e.g., on mobile.
Use the scan picker and compare tool to change the current scan and pick a comparison scan.
The picker shows scans across all scanners for the current organization. By default comparison options are filtered to only show scans which have the same combination of identified vehicles in the scan as the current scan. However, all scans can be searched for in the comparison search input.
Move tool

Note!
The move tool is only available when comparing scans and not on lower resolution screens.
With the move tool active the comparison scan can be moved by clicking and dragging on the comparison scan in the 3D view. The tool option panel to the right of the 3D view presents options to quickly align the two scans.
Moving the scans in the 3D space will also affect their position in the 2D profile plots.
3D measure tool

Note!
The measure tool is not available when comparing scans or and on lower resolution screens.
With the measure tool active clicking on two points of the bins in the 3D view will create a measurement and the computed distance will be outputted at the bottom of the 3D view. Minor adjustments to the measurement can be made by clicking and dragging on the measurement’s handles. The handles will always try lock to points in the point cloud data.
The reported distance can changed to output in metres or yards using the tool options that appear to the right of the 3D view. The selected measurement unit also applies to 2D profile measurements and the browser will remember the last used measurement unit until the user logs out of MyScanner.
2D profiler tool

Note!
The 2D profiler is not available for lower resolution screens.
The 2D profiler tool adds an interactive blue pane to the 3D view. The profiler pane represents the position the LVS or MPS would be above the vehicle for the scan data shown in the 2D plots. The left plot shows the current transverse scan data as seen at the profiler pane’s position. Likewise, the right plot shows the current longitudinal scan data at the profiler pane’s position.
The point size slider to the left of the profile plots changes the size of the scan line points in the plots.
| Action | Mouse controls | Touch controls |
|---|---|---|
| Pan the view | Click + Drag | Tap + Drag |
| Zoom in and out | Scroll in / out | Pinch in / out |
| Start or end a measurement | Click on point | Tap on point |

The distance between points can be measured in the 2D profiles by clicking on two points in a plot, the computed distance will be displayed at the bottom of the plot and will also display in the 3D view when measuring distances in the transverse plot.
Palette tool

When the palette tool is active the tool options panel presents options to change the colours of the bins and the particle size being used when rendering the 3D point clouds.
Lower particle sizes make the bins more see-through and can be better when comparing two bins. Higher particle sizes help when visually identifying large rocks in a load.
The browser will remember the the last used particle size and bin colors until the user logs out of MyScanner.
Snapshot tool
A snapshot can be taken by clicking on the snapshot button ![]() . When clicked a capture of the current 3D view will be opened in a new tab and / or downloaded depending on the browser used.
. When clicked a capture of the current 3D view will be opened in a new tab and / or downloaded depending on the browser used.
The scan info panel

The scan info panel can be opened by clicking on the info button ![]() . When clicked, information about the displayed scans will be shown with links to their detail pages.
. When clicked, information about the displayed scans will be shown with links to their detail pages.
