Printing a record in MyScanner
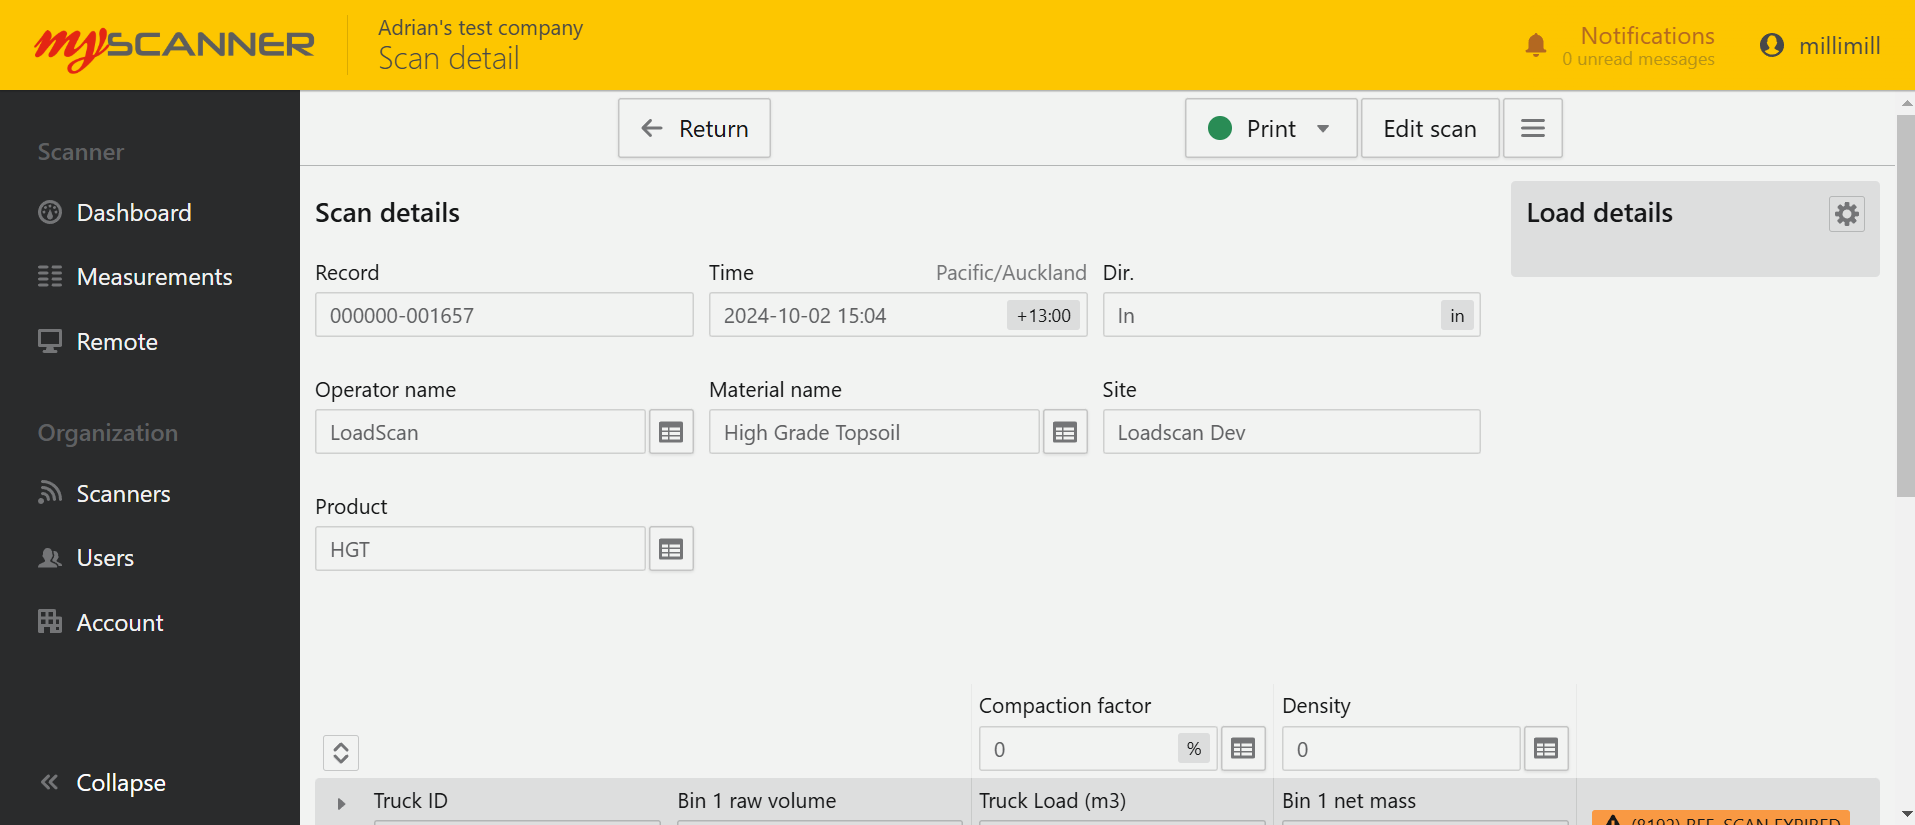
From the Measurements page navigate to the scan detail page by selecting the View details option from the scan actions dropdown.

There is now a Print option available. MyScanner supports printing Measurement records to PDF which will consequently allow you to print on any printer that your browser has access to.
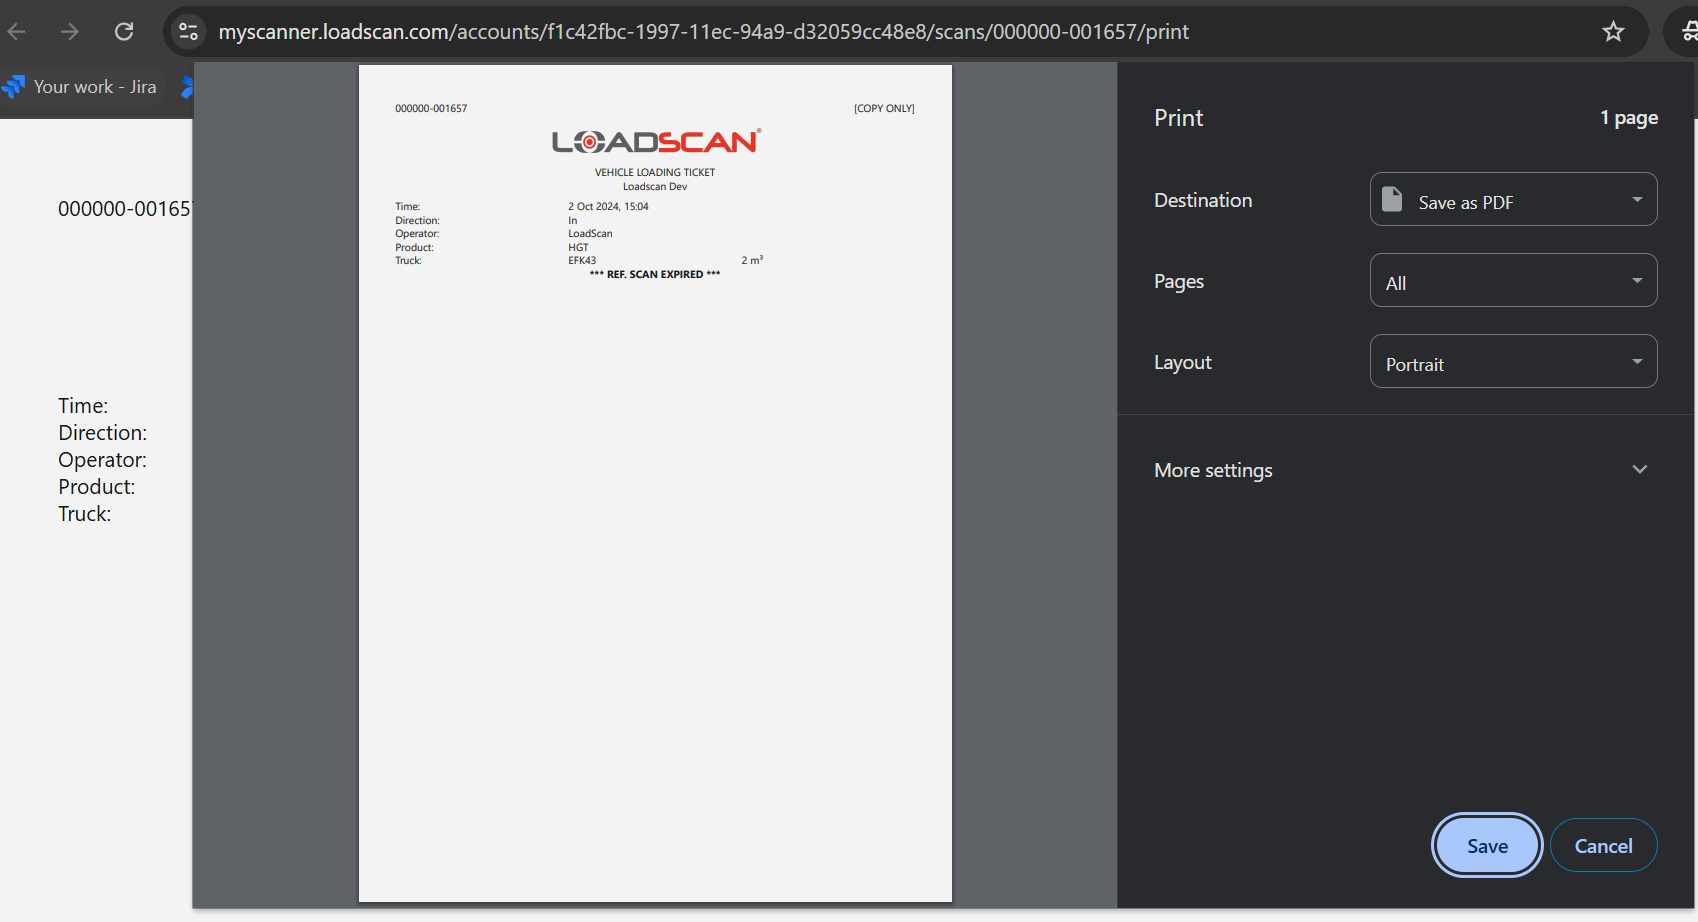
To print a single scan record to PDF, select PDF when you click the Print button on the scan detail page for a measurement record.

This will open the Browser Print Dialog on your device (example below):

Ticket Printing
MyScanner now supports printing tickets in the same format as the LVS device.
To print tickets in MyScanner, you will need to setup up the thermal printer, your computer, and MyScanner. The printer will connect to your local network and can be printed on from any computer on the same network.
Note:
- Tickets will almost always print with “[COPY ONLY]” from MyScanner that are not manual records. This is because the LVS will have a thermal printer which will print the original copy.
- Not all thermal printers will work with MyScanner. Loadscan have approved devices that will work with MyScanner and are available for purchase.
- Thermal printers that are not connected to your network may need to be setup by your IT administrators.
- Installing the required software may need assistance from your IT administrators if you do not have administrator privileges on your device.
Thermal Printer setup
- Place the thermal printer on a flat surface like a table and plug the power cable in.
- Plug a network cable from your network to the printer.
- Turn the printer on
- Nothing will happen initially but the printer will be trying to connect to the network, this can take a few minutes. After 5 minutes it should have connected to the network.
- After 5 minutes, turn the printer off.
- While holding the Feed button turn the printer back on, release the Feed button after 5 seconds.
- This will print out the settings of the printer, it will follow with the ethernet port connection information which is the printers connection to the network. After a minute or less, the “IP Address” will have been set on the printer. The printer will feed more information giving you the IP Address and other various connection details. This means it has connected to the network.
- If you see “IP Address: 0.0.0.0” on the printout, this means that the printer has not connected to the network. Contact an IT person in your organization if you need help with this.
- This will print out the settings of the printer, it will follow with the ethernet port connection information which is the printers connection to the network. After a minute or less, the “IP Address” will have been set on the printer. The printer will feed more information giving you the IP Address and other various connection details. This means it has connected to the network.
- Keep the IP Address details available. This is your connection from your computer to the printer over the network.
Computer Setup
- Download the required software JSPrintManager from this website based on your
operating system: https://www.neodynamic.com/downloads/jspm/- What am I downloading?
JSPrintManager allows the MyScanner website to
connect to your printer on the local network. It’s a small program that can send
print commands to thermal printers and other types of printers. The program
must be running to send print commands from MyScanner to your thermal
printer. This is essentially a “driver” which is software which connects hardware
to your computer, so it recognizes the device.
- What am I downloading?
- Install the JSPrintManager package on your computer.
- You may need to allow the JSPrintManager through your firewall. Contact an IT
person in your organization if you need help with this.
- You may need to allow the JSPrintManager through your firewall. Contact an IT
- You may notice nothing is happening after the install. The program is a background
program so you won’t notice it doing anything until you need to print. MyScanner will let you know if it can connect to the software if the green circle appears next to the Print button on a measurement record scan detail page.

MyScanner Thermal Printer Setup
Go to your MyScanner profile page by clicking your username on the top right of your screen and selecting the Profile option.

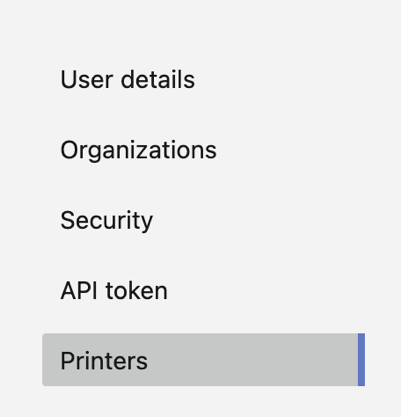
Select the Printers tab

Click the Add Printer button. You will need to provide details for your printer from the Printout you get after the Thermal Printer setup above.

When you press Add Printer the following dialog will display:

- Name: Name your printer in a way that describes where the printer is or what its purpose is within your organization. For example: LVS printer, or Dispatch printer
- Printer IP: This will be the IP of the printer we setup earlier.
- Printer Port: This will generally be 9100. Sometimes the port will be configured differently but this is generally unlikely.
- Printer DNS: If your network needs to set a DNS to allow communication over the network, then add this here. Your organizations IT people should be able to help you with this if you require it.
- User Message: This is a message that will print at the end of a scan. You can leave this blank or have a message like “Have a nice day!” to give your prints a personalized message.
- Once a printer is saved and appears on the list, you will see this printer as an option when you print.
To test the thermal printer has connected go to a measurement and View Details of the measurement record.
You may see a popup from JSPrintManager to allow the connection to MyScanner. Check the Don’t ask again for this site checkbox and then click the Allow button. This will allow JSPrintManager to make connections in the future. (Example below: Mac)

You will see a Print button at the top with a colored circle before the text:

- Grey circle: JSPrintManager is not connecting with MyScanner. JSPrintManager may still be connecting to MyScanner so give the program a few seconds to connect.
- A popup should have appeared when you first opened the details page. If it doesn’t, do the following.
- you may need to allow the domain” myscanner.loadscan.com” to the list of allowed users within “JSPrintManager”.
- Open the “JSPrintManager” settings
- Windows: in your “system tray”, you should see JSPrintManager. Right click it and select “Settings”. On the sites manager tab, add the site: “myscanner.loadscan.com”.
-
- Mac: In the top menu bar you should see JSPrintManager. Click this and select “settings”. On the sites manager tab, add the site: “myscanner.loadscan.com”.
- A popup should have appeared when you first opened the details page. If it doesn’t, do the following.
- Red Circle: The connection to JSPrintManager is blocked by your device. Please contact a IT person within your organization to resolve this.
- Green Circle: The connection to JSPrintManager is good and will take print jobs.
On the Print dropdown menu, select the printer you have setup. This should print a ticket based on the measurement

In this Article
Printing a record in MyScanner
From the Measurements page navigate to the scan detail page by selecting the View details option from the scan actions dropdown.

There is now a Print option available. MyScanner supports printing Measurement records to PDF which will consequently allow you to print on any printer that your browser has access to.
To print a single scan record to PDF, select PDF when you click the Print button on the scan detail page for a measurement record.

This will open the Browser Print Dialog on your device (example below):

Ticket Printing
MyScanner now supports printing tickets in the same format as the LVS device.
To print tickets in MyScanner, you will need to setup up the thermal printer, your computer, and MyScanner. The printer will connect to your local network and can be printed on from any computer on the same network.
Note:
- Tickets will almost always print with “[COPY ONLY]” from MyScanner that are not manual records. This is because the LVS will have a thermal printer which will print the original copy.
- Not all thermal printers will work with MyScanner. Loadscan have approved devices that will work with MyScanner and are available for purchase.
- Thermal printers that are not connected to your network may need to be setup by your IT administrators.
- Installing the required software may need assistance from your IT administrators if you do not have administrator privileges on your device.
Thermal Printer setup
- Place the thermal printer on a flat surface like a table and plug the power cable in.
- Plug a network cable from your network to the printer.
- Turn the printer on
- Nothing will happen initially but the printer will be trying to connect to the network, this can take a few minutes. After 5 minutes it should have connected to the network.
- After 5 minutes, turn the printer off.
- While holding the Feed button turn the printer back on, release the Feed button after 5 seconds.
- This will print out the settings of the printer, it will follow with the ethernet port connection information which is the printers connection to the network. After a minute or less, the “IP Address” will have been set on the printer. The printer will feed more information giving you the IP Address and other various connection details. This means it has connected to the network.
- If you see “IP Address: 0.0.0.0” on the printout, this means that the printer has not connected to the network. Contact an IT person in your organization if you need help with this.
- This will print out the settings of the printer, it will follow with the ethernet port connection information which is the printers connection to the network. After a minute or less, the “IP Address” will have been set on the printer. The printer will feed more information giving you the IP Address and other various connection details. This means it has connected to the network.
- Keep the IP Address details available. This is your connection from your computer to the printer over the network.
Computer Setup
- Download the required software JSPrintManager from this website based on your
operating system: https://www.neodynamic.com/downloads/jspm/- What am I downloading?
JSPrintManager allows the MyScanner website to
connect to your printer on the local network. It’s a small program that can send
print commands to thermal printers and other types of printers. The program
must be running to send print commands from MyScanner to your thermal
printer. This is essentially a “driver” which is software which connects hardware
to your computer, so it recognizes the device.
- What am I downloading?
- Install the JSPrintManager package on your computer.
- You may need to allow the JSPrintManager through your firewall. Contact an IT
person in your organization if you need help with this.
- You may need to allow the JSPrintManager through your firewall. Contact an IT
- You may notice nothing is happening after the install. The program is a background
program so you won’t notice it doing anything until you need to print. MyScanner will let you know if it can connect to the software if the green circle appears next to the Print button on a measurement record scan detail page.

MyScanner Thermal Printer Setup
Go to your MyScanner profile page by clicking your username on the top right of your screen and selecting the Profile option.

Select the Printers tab

Click the Add Printer button. You will need to provide details for your printer from the Printout you get after the Thermal Printer setup above.

When you press Add Printer the following dialog will display:

- Name: Name your printer in a way that describes where the printer is or what its purpose is within your organization. For example: LVS printer, or Dispatch printer
- Printer IP: This will be the IP of the printer we setup earlier.
- Printer Port: This will generally be 9100. Sometimes the port will be configured differently but this is generally unlikely.
- Printer DNS: If your network needs to set a DNS to allow communication over the network, then add this here. Your organizations IT people should be able to help you with this if you require it.
- User Message: This is a message that will print at the end of a scan. You can leave this blank or have a message like “Have a nice day!” to give your prints a personalized message.
- Once a printer is saved and appears on the list, you will see this printer as an option when you print.
To test the thermal printer has connected go to a measurement and View Details of the measurement record.
You may see a popup from JSPrintManager to allow the connection to MyScanner. Check the Don’t ask again for this site checkbox and then click the Allow button. This will allow JSPrintManager to make connections in the future. (Example below: Mac)

You will see a Print button at the top with a colored circle before the text:

- Grey circle: JSPrintManager is not connecting with MyScanner. JSPrintManager may still be connecting to MyScanner so give the program a few seconds to connect.
- A popup should have appeared when you first opened the details page. If it doesn’t, do the following.
- you may need to allow the domain” myscanner.loadscan.com” to the list of allowed users within “JSPrintManager”.
- Open the “JSPrintManager” settings
- Windows: in your “system tray”, you should see JSPrintManager. Right click it and select “Settings”. On the sites manager tab, add the site: “myscanner.loadscan.com”.
-
- Mac: In the top menu bar you should see JSPrintManager. Click this and select “settings”. On the sites manager tab, add the site: “myscanner.loadscan.com”.
- A popup should have appeared when you first opened the details page. If it doesn’t, do the following.
- Red Circle: The connection to JSPrintManager is blocked by your device. Please contact a IT person within your organization to resolve this.
- Green Circle: The connection to JSPrintManager is good and will take print jobs.
On the Print dropdown menu, select the printer you have setup. This should print a ticket based on the measurement

