Scan Track establishment
More more information, refer to Appendix 2 of the Operator Manual here.

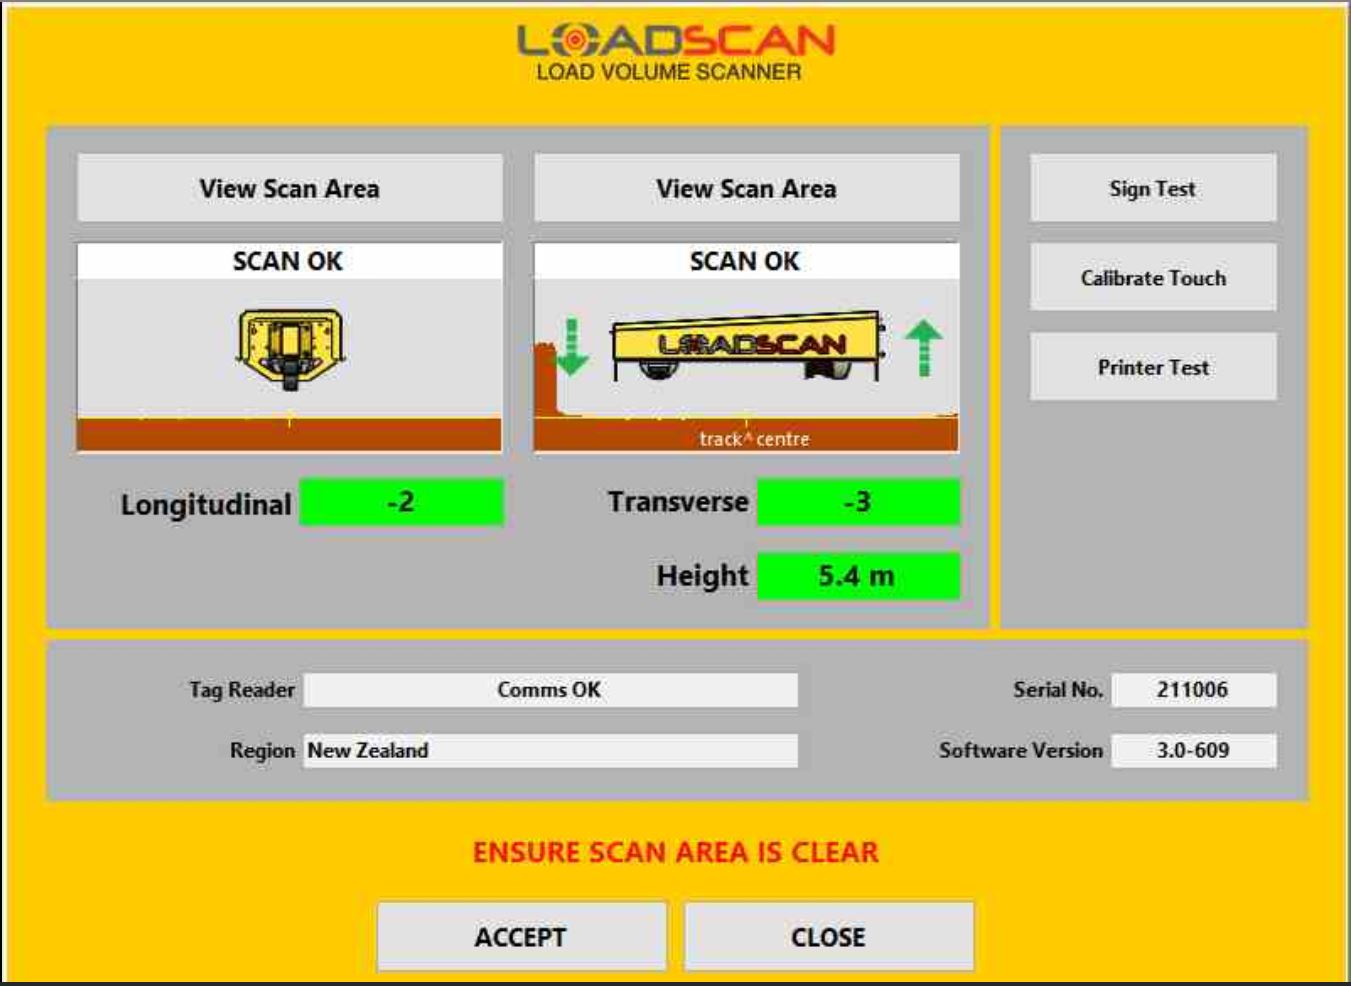
Scanner alignment
- Main Screen > Select System > P/W TALLY
- Make sure Longitudinal & Transverse numbers are as close to 0 as possible and the values in the box are in a green background
- If any of the values are in a red background, adjust the scan head or trailer machine stand jacks accordingly depending on the LVS model that you have*
- Select Accept and enter your name and Location
For more information, refer to Appendix 2 of the Operator Manual here.
Site location name
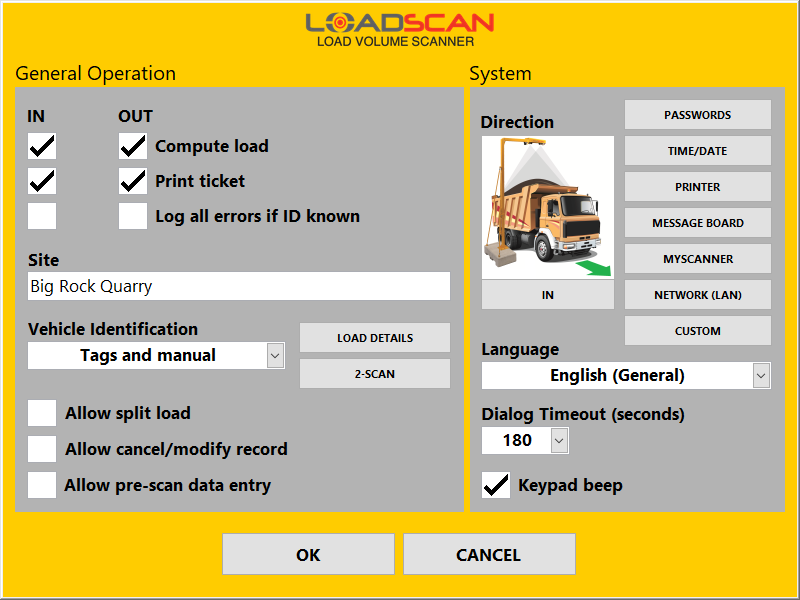
- Main Screen > Settings > P/W TALLY
- Select Site
- Enter in site name
- Press Enter button
For more information, refer to User Configuration Options in the Operator Manual here.
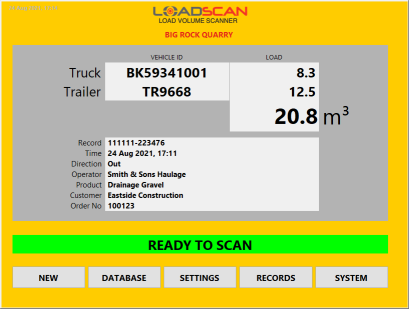
General scan procedure
- Ensure the truck’s tarp is stowed
- Instruct the truck to drive through the defined scan track at 6kph (4mph) until they are 4.5m (15ft) clear of the scanner
- The variable message board will prompt instructions to the driver. (Ready To Scan _Proceed _ Scanning _ Wait For Results)
For more information, refer to Basic Operation in the Operator Manual here.
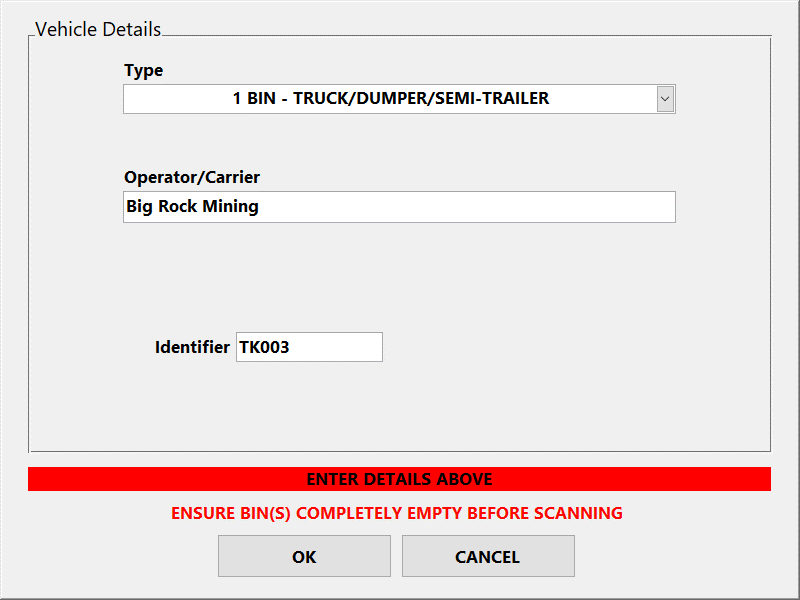
On-boarding a new truck
- Main Screen > New > P/W TALLY
- Add Operator Carrier (Name of the trucking company on the side of the truck – eg. Bob’s Trucking)
- Add truck bin (enter the truck or trailer registration/licence number you wish to identify the bin as)
- Select OK
- Perform General Scan Procedure
For more information, refer to Basic Operation in the Operator Manual here.
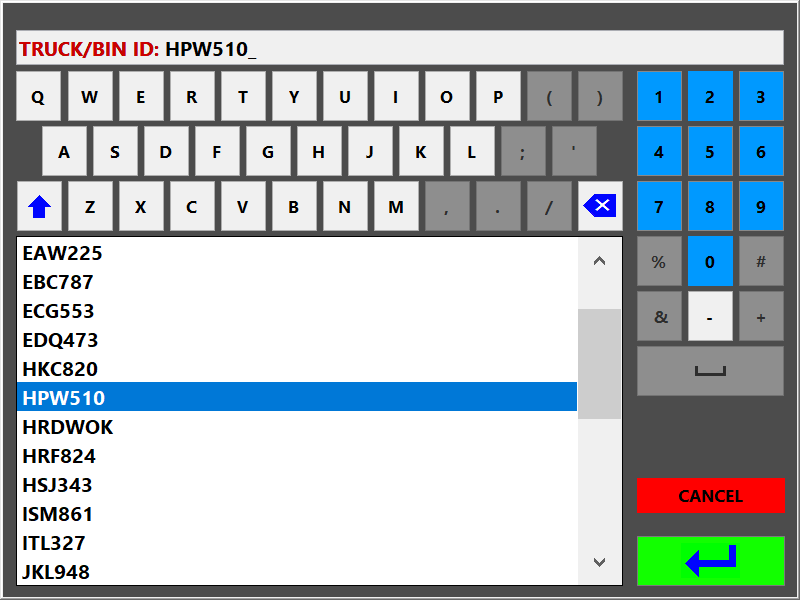
Scanning a load
- Leave system on the Main Screen
- Perform the General Scan Procedure
- Console will prompt for Truck/Trailer ID > Select the correct ID > Select Green arrow
- Select the required Load Details (if applicable)
For more information, refer to Basic Operation in the Operator Manual here.
Editing a truck’s information
- Main Screen > Database > P/W TALLY
- Select the keypad at the bottom of the truck list
- Enter Truck/ Trailer ID
- Select Edit
- Make edits to operator or identifier
For more information, refer to Vehicle Database Management in the Operator Manual here.
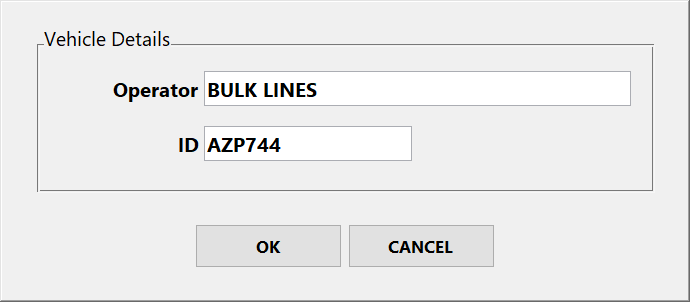
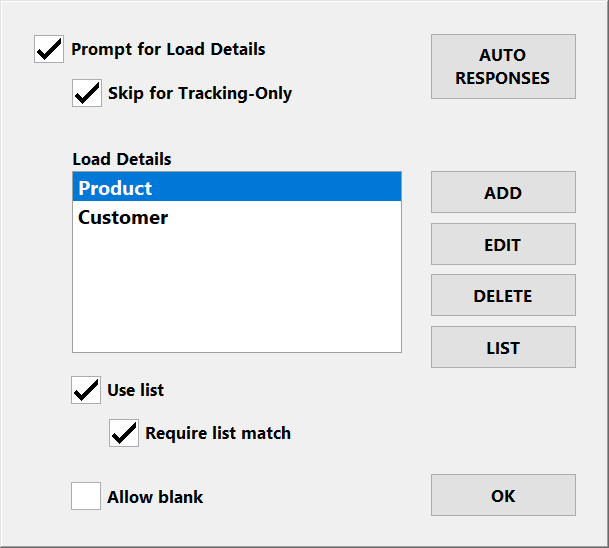
Setting up load details
- Main Screen > Settings > P/W TALLY
- Select Load Details
- Select Add > Enter in desired load detail (Eg. Customer or Material) > Select OK
For more information, refer to User Configuration Options in the Operator Manual here.
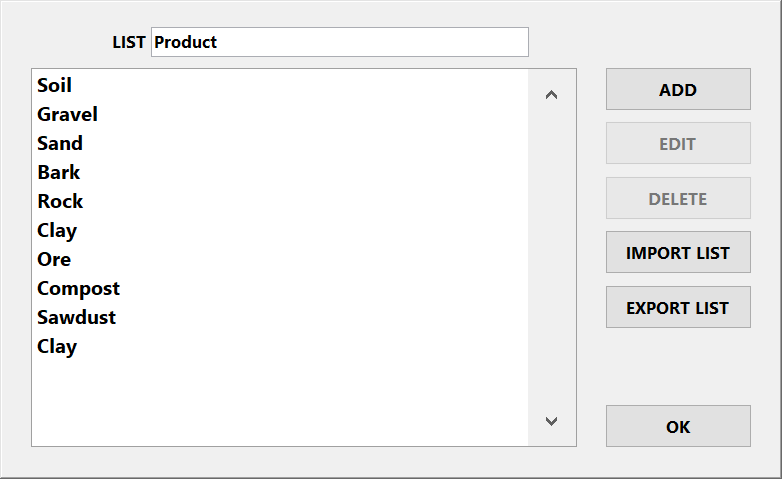
Adding information to the Load detail
- Main Screen > Settings > P/W TALLY
- Select Load Details
- Highlight the load detail you want to edit > Select List > Select Add
- Input the load detail information
For more information, refer to User Configuration Options in the Operator Manual here.
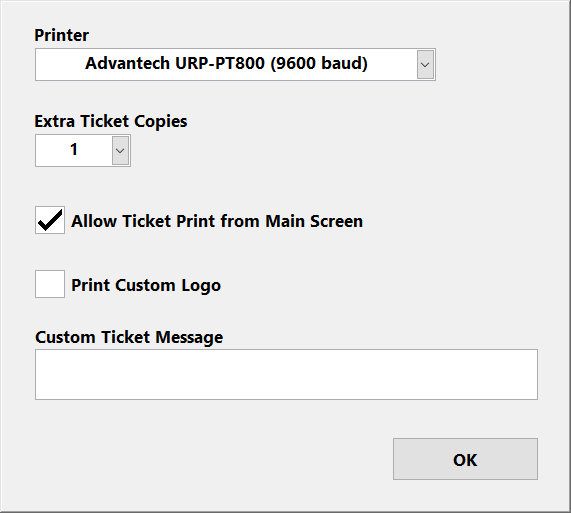
Printing additional tickets
- Main Screen > Settings > P/W TALLY
- Select Printer
- Change extra copies from 0 to the desired amount
- Select OK
For more information, refer to User Configuration Options in the Operator Manual here.
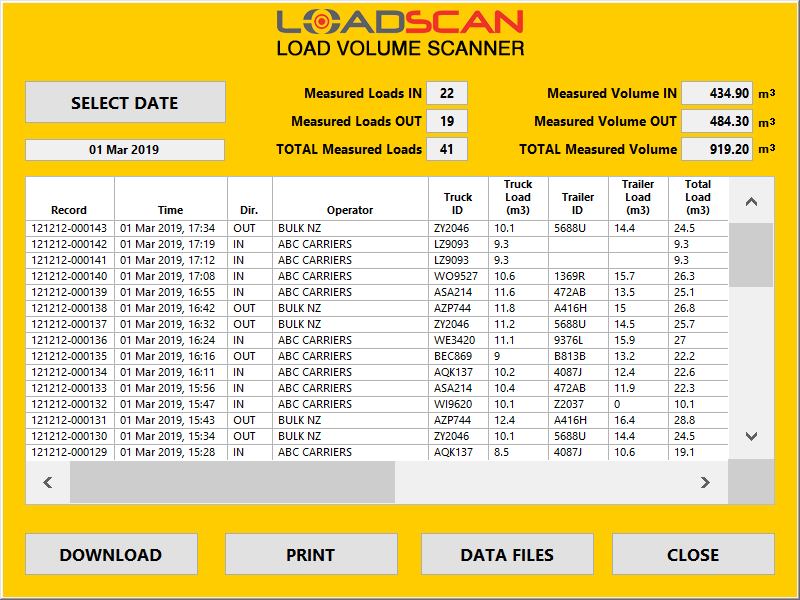
Print a duplicate ticket
- Main Screen > Records > P/W TALLY
- Highlight the load on the report
- Select Print
For more information, refer to Reviewing Measurement Records in the Operator Manual here.
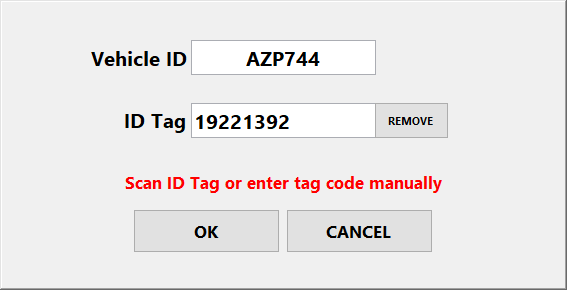
Assigning a RFID Tag to existing Truck/Trailer
- Main Screen > Database > P/W TALLY
- Select desired Truck/Trailer
- Select ID Tag
- Wave tag underneath scan head
- If successful, ID tag info will now show the number
For more information, refer to Vehicle Database Management in the Operator Manual here.
In this Article
Scan Track establishment
More more information, refer to Appendix 2 of the Operator Manual here.


Scanner alignment
- Main Screen > Select System > P/W TALLY
- Make sure Longitudinal & Transverse numbers are as close to 0 as possible and the values in the box are in a green background
- If any of the values are in a red background, adjust the scan head or trailer machine stand jacks accordingly depending on the LVS model that you have*
- Select Accept and enter your name and Location
For more information, refer to Appendix 2 of the Operator Manual here.
Site location name
- Main Screen > Settings > P/W TALLY
- Select Site
- Enter in site name
- Press Enter button
For more information, refer to User Configuration Options in the Operator Manual here.


General scan procedure
- Ensure the truck’s tarp is stowed
- Instruct the truck to drive through the defined scan track at 6kph (4mph) until they are 4.5m (15ft) clear of the scanner
- The variable message board will prompt instructions to the driver. (Ready To Scan _Proceed _ Scanning _ Wait For Results)
For more information, refer to Basic Operation in the Operator Manual here.
On-boarding a new truck
- Main Screen > New > P/W TALLY
- Add Operator Carrier (Name of the trucking company on the side of the truck – eg. Bob’s Trucking)
- Add truck bin (enter the truck or trailer registration/licence number you wish to identify the bin as)
- Select OK
- Perform General Scan Procedure
For more information, refer to Basic Operation in the Operator Manual here.


Scanning a load
- Leave system on the Main Screen
- Perform the General Scan Procedure
- Console will prompt for Truck/Trailer ID > Select the correct ID > Select Green arrow
- Select the required Load Details (if applicable)
For more information, refer to Basic Operation in the Operator Manual here.
Editing a truck’s information
- Main Screen > Database > P/W TALLY
- Select the keypad at the bottom of the truck list
- Enter Truck/ Trailer ID
- Select Edit
- Make edits to operator or identifier
For more information, refer to Vehicle Database Management in the Operator Manual here.


Setting up load details
- Main Screen > Settings > P/W TALLY
- Select Load Details
- Select Add > Enter in desired load detail (Eg. Customer or Material) > Select OK
For more information, refer to User Configuration Options in the Operator Manual here.
Adding information to the Load detail
- Main Screen > Settings > P/W TALLY
- Select Load Details
- Highlight the load detail you want to edit > Select List > Select Add
- Input the load detail information
For more information, refer to User Configuration Options in the Operator Manual here.


Printing additional tickets
- Main Screen > Settings > P/W TALLY
- Select Printer
- Change extra copies from 0 to the desired amount
- Select OK
For more information, refer to User Configuration Options in the Operator Manual here.
Print a duplicate ticket
- Main Screen > Records > P/W TALLY
- Highlight the load on the report
- Select Print
For more information, refer to Reviewing Measurement Records in the Operator Manual here.


Assigning a RFID Tag to existing Truck/Trailer
- Main Screen > Database > P/W TALLY
- Select desired Truck/Trailer
- Select ID Tag
- Wave tag underneath scan head
- If successful, ID tag info will now show the number
For more information, refer to Vehicle Database Management in the Operator Manual here.
